
Start by printing your reference photo at the size you want to draw it, then sketch a light oval with two center axes on your paper. Place the eyeline approximately halfway down the head. That single move, done before you touch shading, is what separates a beginner portrait that looks "off" from one that looks like a real person. Grab an HB pencil, your printed photo, and begin.
TL;DR:
- Proper proportion placement, especially placing the eyes halfway down and the nose midpoint between the eyeline and chin, is crucial for realistic portraits.
- Using a simple oval shape, centerline, and eyeline as initial guides simplifies structure and improves accuracy before shading or detail work begins.
- Gradually layering tones from light to dark, while preserving highlights with kneaded erasers, results in more believable skin textures and depth.
- Consistent short practice sessions focused on measurement and feature placement accelerate improvement more effectively than infrequent long sessions.
- Beginners should prioritize understanding basic facial landmarks and proportion rules before attempting advanced techniques or complex shading methods.
Table of Contents
- Portrait Drawing for Beginners: What You Actually Need to Start
- What Are the Basic Proportions of a Portrait?
- How Do You Draw a Portrait Step by Step?
- How Do You Shade a Portrait to Look Realistic?
- How Much Should Beginners Practice Portrait Drawing?
- Common Portrait Drawing Mistakes and How to Fix Them
- Brittany's Approach to Realistic Portrait Drawing
- Why Facial Anatomy Basics Make Your Portraits More Believable
- Choosing a Portrait Style That Fits Your Goal
- How to Draw Facial Expressions and Emotion
- Drawing Diverse Faces: Age, Ethnicity, and Gender
- A Beginner's Honest Path to Better Portraits
- Ready for Structured, Step-by-Step Lessons?
- Sources
- FAQ
Portrait Drawing for Beginners: What You Actually Need to Start
You don't need fifty pencils or a professional easel to start portrait drawing for beginners the right way. You need a short list of tools used correctly, and a workspace that doesn't fight you while you draw.
Here's the essential kit that covers almost every situation you'll run into as a beginner:
- A sketchbook or drawing paper with slight tooth (texture), which holds graphite better than smooth printer paper
- A small pencil range: HB for construction lines, 2B for early tone, 4B for mid-darks, 6B for deep shadows
- A kneaded eraser, which molds like putty and lifts graphite cleanly instead of smudging it
- A standard pencil sharpener, kept within reach so you're not drawing with a dull point
- A blending stump or a rolled piece of tissue for smoothing transitions
- Masking tape, to hold your reference photo steady while you work
Beginners genuinely benefit from a slightly textured sketchbook, a range of graphite pencils, a kneaded eraser, and a sharpener as their starting kit, and printing a reference photo at the intended drawing size makes measuring proportions dramatically easier, according to Caran d'Ache's drawing supplies guide. If you're drawing on a standard sheet, print your reference at A4 or crop it so the head fills roughly the same space it will occupy on your paper. Tape it directly beside your drawing surface, at the same height, so your eyes travel a short, consistent distance every time you check it. No lightbox? A simple grid drawn lightly over a printed copy of your reference works almost as well for lining up features.
Light direction matters more than most beginners expect. Position your lamp or window light so it falls across your paper from the same side consistently. Shifting light sources mid-session throws off how you judge your own shading. Sit somewhere you can hold for an hour without your arm cramping. Once a piece is finished, keep it flat, away from direct sunlight, and consider a fixative spray to protect the graphite from smudging over time. If you fall in love with portrait work, choosing the right graphite pencils becomes worth a closer look.
Pro Tip: Buy your kneaded eraser before your first drawing session, not after. Beginners who skip it end up scrubbing highlights back in with a regular eraser, which tears paper fibers and leaves a dull gray smear instead of a clean white.
What Are the Basic Proportions of a Portrait?
The head follows a small set of proportion rules that hold true across most faces, and learning them is the fastest shortcut to portraits that look structurally correct. Eyes are typically placed about halfway down the head, and the base of the nose is usually located midway between the eyeline and the chin. These two checkpoints alone will fix most of the "something looks wrong" feeling beginners get, according to Drawing Lab's face proportion guide.
A few more rules worth memorizing early:
- The mouth usually sits closer to the nose than to the chin, not dead center between them
- The space between the eyes typically equals the width of one eye
- The head, viewed straight on, divides roughly into thirds: hairline to brow, brow to nose base, nose base to chin
- Ears generally align between the eyebrow line and the base of the nose
To build the head, start with a light oval or egg shape, then draw a vertical centerline down the middle and a horizontal eyeline across it. Artist demonstrations consistently recommend starting with simple shapes, marking a centerline and eyeline, and checking head tilt before refining proportions or adding any shading, according to the National Portrait Gallery's step-by-step demonstration. This order matters. Fix the skeleton before you dress it.
Tilted and three-quarter views change how these lines behave. When a head tilts, your eyeline curves slightly instead of running straight, and the centerline bends to follow the direction of the tilt. In a three-quarter view, the far side of the face compresses, so the halfway rules still apply, but the spacing on the far side of the centerline shrinks compared to the near side.
Here's a fast way to check your own work: hold a pencil at arm's length against your reference photo and measure the eye to chin distance, then compare it to the same measurement on your drawing. If your ratios don't match, don't erase and start guessing. Adjust the axis lines first, then nudge the features to follow them. Most proportion errors in beginner portraits trace back to an eyeline drawn too high, which pushes everything below it out of alignment.
How Do You Draw a Portrait Step by Step?
Every reliable portrait workflow moves from large, simple shapes toward small, specific details. Skipping ahead to eyelashes before your proportions are locked in is the single most common way beginners waste hours redrawing the same face.
-
Choose and prepare your reference. Pick a photo with clear, directional lighting so shadows read distinctly. Print it at the size you plan to draw, and tape it beside your paper.
-
Block in the head. Lightly draw your oval, centerline, and eyeline with an HB pencil. Keep the pressure so light you could erase it with a breath. This stage exists purely to test proportions, not to make marks you'll keep.
-
Map the major features. Place small marks for the inner and outer corners of the eyes, the width of the nose, and the corners of the mouth, using the halfway checkpoints from the previous section. Don't draw eyeballs or lips yet, just placement marks.
-
Refine the shapes. Now loosely sketch the actual forms: the almond shape of the eyes, the triangular structure of the nose, the curve of the lips and jaw. Still light pencil. Still HB or a soft 2B at most.
-
Verify before you commit. Flip your drawing horizontally (hold it to a mirror, or use your phone camera flipped), and compare it side by side with your reference. Errors that hide from your eye in the normal orientation jump out instantly when flipped. Step back three or four feet and squint. If a feature looks misplaced from a distance, fix it now, before any shading locks it in.
-
Lay in the tonal masses. Switch to a 2B and identify the biggest, simplest shadow shapes on the face: the shadow under the brow, along the side of the nose, beneath the lower lip, and under the jaw. Block these in as flat, simple shapes first, the way an artist blocks in the head before introducing tone progressively and only focusing on individual features once the tonal masses are established, according to Artists & Illustrators' pencil portrait workflow. This single habit fixes more likeness problems than any amount of feature detailing.
-
Build form with layered tone. Once your tonal masses are placed, gradually deepen them with a 4B, working from midtone toward shadow rather than jumping straight to black. Layering in stages, rather than pressing hard once, gives you control and keeps your options open if a value looks too dark too soon.
-
Refine details and edges last. Only now should you add the fine details: individual eyelashes, subtle skin texture, strands of hair, the glint in an eye. Save your 6B for the very darkest accents, like the pupil or the deepest shadow under the chin, and use it sparingly.
At every stage, resist the urge to commit to heavy darks early. A portrait built entirely from midtones that you deepen gradually is far easier to correct than one where you've already pressed a 6B into the paper on your first pass. Measurement never stops either; keep checking your reference throughout, not just at the block-in stage.
Pro Tip: Keep a small mirror by your desk and glance at your drawing through it every 15 minutes. Your brain gets used to a drawing's flaws the longer you stare at it directly, but a mirror flip resets your eye and catches asymmetry instantly.
How Do You Shade a Portrait to Look Realistic?
Realistic shading comes down to reading light in zones, not trying to render every pore you see. Simplify what you observe into four bands: the highlight, the midtone, the core shadow, and the reflected light bouncing back into the shadow side from nearby surfaces. Map these zones early, before you commit to any single technique, because the placement of your darkest core shadow determines where the form actually turns.
A few techniques do most of the heavy lifting in a pencil portrait:
- Use the side of the pencil, not the tip, to block in broad tonal areas quickly and evenly
- Follow the surface direction with your hatch strokes, curving them around the cheekbone or jaw the way the skin itself curves, rather than shading in flat, straight lines
- Blend with a stump or tissue only after your tone is laid in, using light circular motions rather than heavy scrubbing
- Lift highlights back out with a kneaded eraser shaped to a fine point, rather than trying to draw around them from the start
Layer your pencils in a consistent progression: start with a harder grade like HB or 2B for your initial tonal blocking, then move to 4B and 6B as you deepen shadows and add contrast. Shading advice built around this same principle recommends blocking in midtones first, then layering darker tones gradually while protecting highlights with a kneaded or putty eraser, according to Hobbycraft's portrait sketching guide.
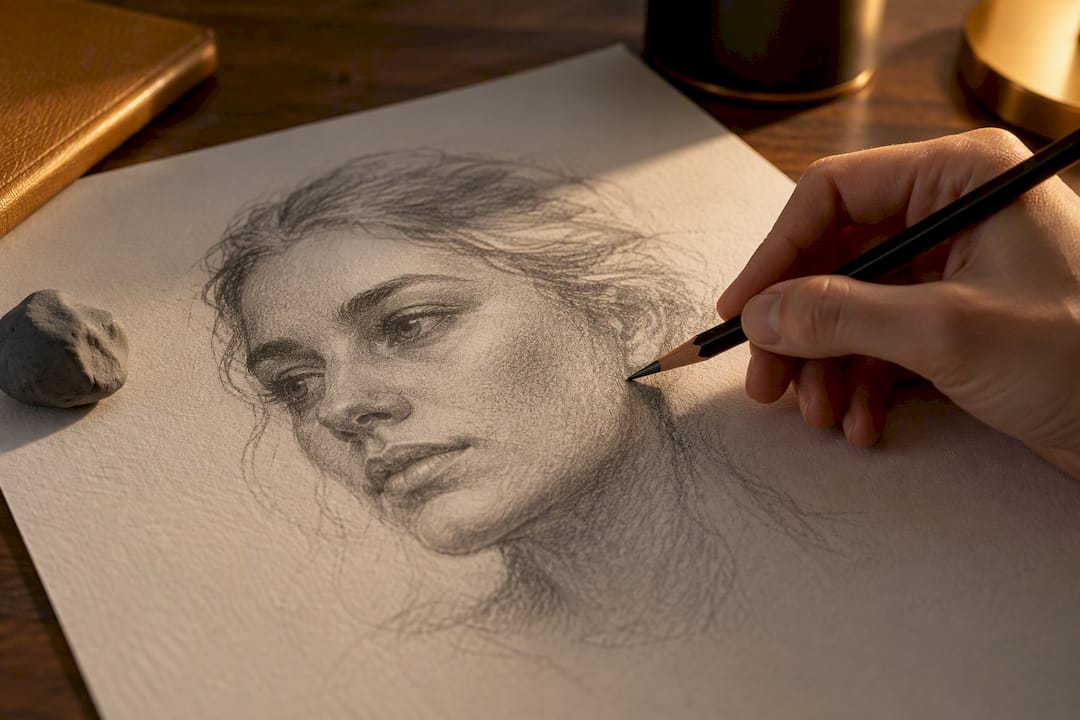
One habit ruins skin texture faster than anything else: pressing too hard, too early, until the paper's tooth flattens out and starts to shine under light. Once that happens, no amount of additional graphite will sit correctly on the surface again. Work in light layers, check your drawing under a raking light angle every so often, and if you see a waxy sheen developing, switch to a fresh area of the face and come back later with a lighter touch. Preserving that paper texture is often what separates flat-looking shading from skin that reads as believable.
How Much Should Beginners Practice Portrait Drawing?
Short, focused drills done daily build skill faster than occasional marathon sessions. Fifteen to thirty minutes of deliberate practice on lines, shapes, and measurement, repeated consistently, produces steadier improvement than an irregular three-hour session once a week, according to Drawinglics' guide on foundational drawing techniques.
Structure your week like this:
-
Two feature-study days. Pick one feature, an eye, a nose, or a mouth, and draw it five or six times from different reference photos. Isolating a single feature accelerates how quickly that skill transfers into full portraits.
-
Two quick head-study days. Set a timer for 20 minutes and complete a full, loose head sketch focused purely on proportion and basic tonal blocking. Don't chase detail here.
-
One small finished portrait. Spend a longer session, an hour or two, bringing one drawing through the full workflow from block in to finished shading.
Check in at week two and week four. By week two, your proportion checks should be getting faster and more automatic. By week four, compare your first finished portrait against your most recent one side by side. Keep a simple practice log, even just a notebook line per session noting what felt hard, so you can spot patterns in your own recurring mistakes.
Pro Tip: Time yourself drawing a quick self-portrait once a month using the same setup and reference. The comparison over three or four months tells you far more about your progress than judging any single drawing on its own.
Common Portrait Drawing Mistakes and How to Fix Them
Most beginner portrait problems trace back to a handful of repeat offenders, and every one of them is fixable without starting over.
- Eyeline placed too high. This pushes every feature below it out of alignment. Re-measure from the top of the head to the chin, mark the true halfway point, and shift your eyeline before touching anything else.
- Heavy darks added too early. Once a 6B hits the paper at full pressure, it's hard to soften. Build tone in layers starting with 2B, and save your darkest pencil for the very last pass.
- Lost highlights. If shading has crept into an area meant to stay bright, shape your kneaded eraser to a point and lift the graphite back out gently, rather than scrubbing with a regular eraser.
- Stiff, hard outlines around features. Real faces don't have outlines; they have edges defined by tone. Soften harsh lines by shading directly over them, and let your hatching follow the curve of the surface instead of tracing a border.
- Ignoring head tilt. Drawing a straight eyeline on a tilted head guarantees a lopsided result. Recheck your centerline against the actual angle in your reference before placing features.
Brittany's Approach to Realistic Portrait Drawing
Skin texture is where most beginner portraits fall apart, not because the artist lacks talent, but because rendering pores, fine lines, and subtle tonal shifts realistically requires a repeatable system rather than guesswork. Brittany Clare developed her technique specifically around this problem: a structured, repeatable pattern approach to skin that removes the trial and error most self-taught artists spend years working through.
If you want to go deeper than the fundamentals covered here, a few resources extend this same method:
- The 12-page eBook on mastering portrait skin patterns breaks Brittany's repeatable skin technique into a compact, step-by-step format
- The "A Dark Beauty" tutorial walks through a complete full-realism portrait from block-in to finished detail, applying the same principles covered in this guide at a more advanced level
Why Facial Anatomy Basics Make Your Portraits More Believable
Skin sits on top of muscle and bone, and even a light understanding of what's underneath changes how convincingly you render the surface. You don't need a medical textbook's worth of anatomy to draw better portraits, just a working knowledge of a few structures that shape the face's surface planes.
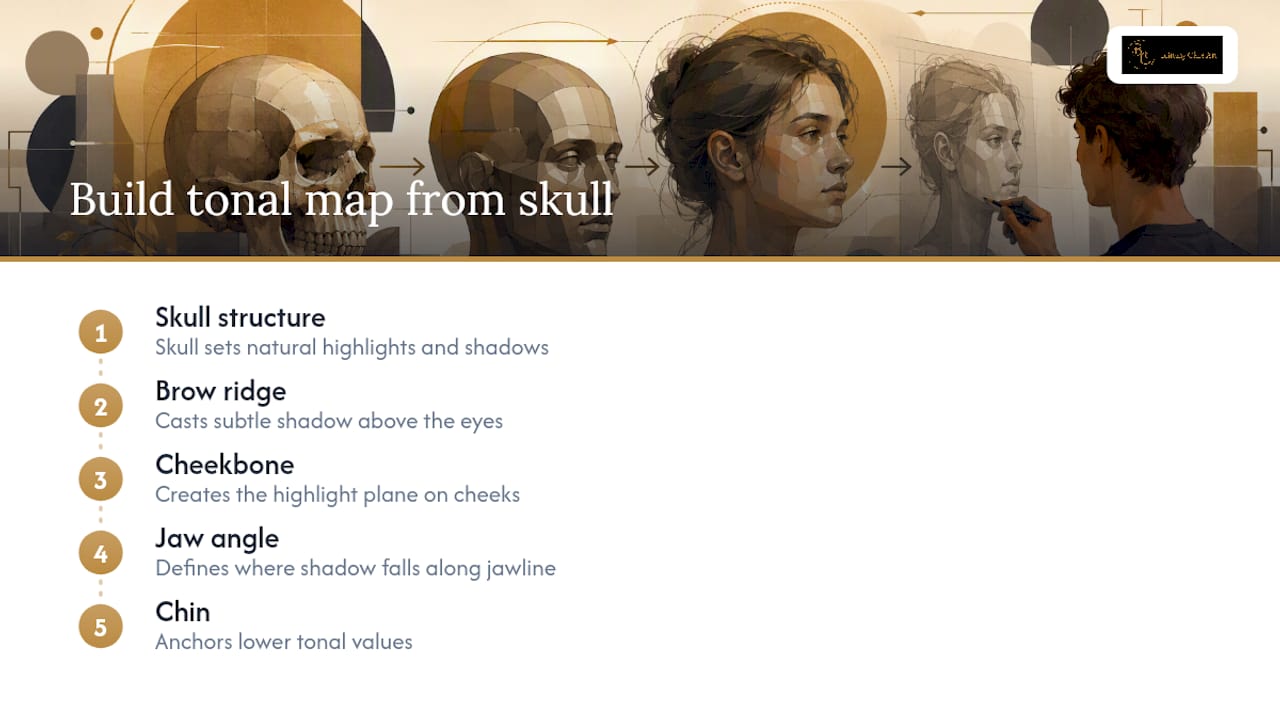
The orbicularis oculi, the ring of muscle circling each eye, is why the skin around the eyes creases into fine lines when someone smiles genuinely. The zygotic bone, your cheekbone, creates the highlight plane that catches light on most faces, which is why beginners who skip understanding bone structure often flatten the cheek area into a featureless slope. The mandible, or jawbone, defines where shadow falls along the jawline, and its angle varies more between individuals than almost any other facial landmark.
Muscles around the mouth, particularly the orbicularis oris circling the lips, dictate how the lips fold and compress during different expressions, which is why a mouth drawn without considering underlying muscle tends to look pasted onto the face rather than part of it.
You don't need to label every muscle while you draw. But knowing that the skull, not the skin, determines where highlights and shadows naturally fall will change how you observe a reference photo. Look for the bony landmarks first, brow ridge, cheekbone, chin, jaw angle, and build your tonal map around them.
Choosing a Portrait Style That Fits Your Goal
Portrait drawing isn't one fixed approach, and picking the right style for your goal saves you from frustration when a technique doesn't match your reference or your patience level. Beginners generally benefit from understanding three broad categories before committing to one.
Realistic or hyperrealistic portraits aim to replicate a photograph as closely as possible, with smooth tonal transitions, precise proportions, and fine detail in skin and hair. This style demands the most time and the layered shading approach covered earlier in this guide, but it's also the most forgiving of learning proportion rules step by step, since every checkpoint has a clear right answer.
Loose or gestural portraits favor energy and quick observation over precision. These are built from confident, minimal lines and simplified shading, often completed in 15 to 30 minutes. This style suits the quick head-study drills in your practice routine and builds the same underlying proportion instincts without the time investment of a finished piece.
Stylized or caricature portraits exaggerate specific features for expression or humor, which requires you to understand proportion rules well enough to intentionally break them. This is not a beginner's starting point, but it becomes accessible once realistic proportions feel automatic.
Most beginners benefit from spending the bulk of their early practice in realistic and loose styles, since both reinforce the same measurement and observation skills, just at different speeds.
How to Draw Facial Expressions and Emotion
A technically perfect portrait with a dead, flat expression reads as lifeless, and expression comes down to a small number of muscle movements you can learn to identify. The eyes and mouth carry most of the emotional weight, but they rarely move independently of the rest of the face.
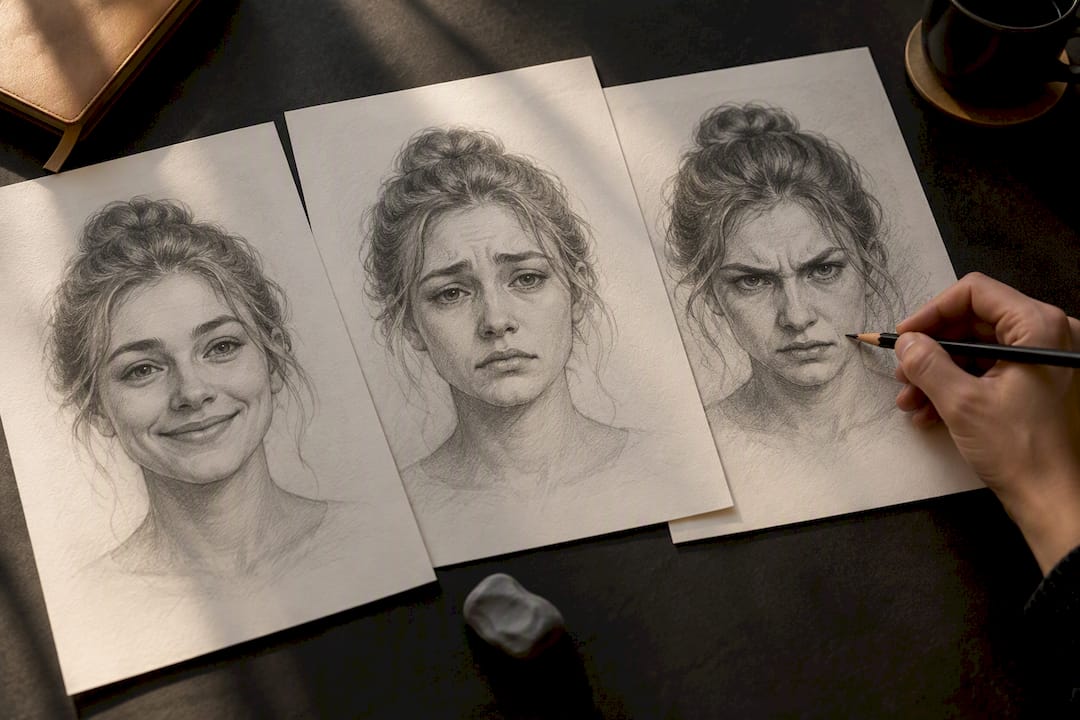
A genuine smile lifts the cheeks and creates fine creases at the outer corners of the eyes, not just curved lips. Draw a mouth turning up without the surrounding eye creases and cheek lift, and the expression will read as forced or artificial, a mismatch most viewers notice instinctively even if they can't say why.
Sadness pulls the inner corners of the eyebrows upward and slightly together, often with the outer corners of the mouth drawing down. Anger tends to lower and draw the eyebrows together into a tighter line, with the nostrils sometimes flaring slightly.
Practice isolating these small shifts by drawing the same face with only the eyebrows changed, then only the mouth, so you can see how much emotional weight each individual feature carries on its own. Reference photos with clear, unambiguous expressions are far more useful for this practice than subtle or neutral ones, especially while you're still learning to spot the muscle groups involved.
Drawing Diverse Faces: Age, Ethnicity, and Gender
The proportion rules covered earlier hold up as reliable starting points across most faces, but real skill comes from adjusting your observation for the individual in front of you rather than forcing every face into an identical template.
Age changes the face's surface more than its underlying proportions. Younger faces have smoother tonal transitions with fewer defined creases, while older faces develop deeper folds, particularly around the eyes, mouth, and forehead, along with looser skin along the jaw that changes how light and shadow behave there. Children's proportions differ from adults' in a specific way: their eyes sit lower relative to the total head height, and the forehead occupies a larger portion of the face than the halfway rule suggests for adults.
Ethnic variation shows up primarily in bone structure, such as the width and projection of the cheekbones, the bridge and width of the nose, and the fullness of the lips, along with a wide natural range of skin tones that each require adjusting your value range rather than your proportion rules. The core measurement checkpoints, eyeline at the halfway mark, nose base at the halfway point between eyes and chin, still apply; what changes is the specific shape and width you draw within those guides.
Gender differences in facial structure tend to be subtle rather than absolute: brow ridges are often slightly more pronounced in male faces, jawlines often (though not always) more angular, and features somewhat softer or rounder in female faces on average. Treat every reference as an individual first. The proportion system gives you the scaffolding; observation fills in what makes that specific face unique.
A Beginner's Honest Path to Better Portraits
Portrait drawing rewards patience more than raw talent, and the biggest breakthrough most beginners experience happens around the same point: the moment the eyes suddenly "come alive" on the page. It usually isn't the eyes themselves that fix it. It's finally getting the surrounding tonal structure and proportion checkpoints right at the same time, and the eyes are simply where that improvement becomes visible first.
Short daily practice beats sporadic long sessions every time. Fifteen focused minutes, five days a week, will move your skill further in a month than one exhausted four-hour session on a Sunday. Trust the checkpoints over your instinct at first. Your eye calibrates with repetition, not willpower.
— Brittany
Ready for Structured, Step-by-Step Lessons?
Everything in this guide gives you a solid foundation, but if you want the shortcuts that took years to develop condensed into a guided format, The digital downloads pick up exactly where this article leaves off. Instead of piecing together proportion rules, shading theory, and skin technique from scattered sources, you work through one structured lesson at a time.

The 12-page eBook on mastering portrait skin patterns takes the repeatable skin-texture method mentioned earlier and breaks it into a step-by-step format you can work through at your own pace, ideal once you've got the basic proportion and shading steps from this guide under your belt. If you're ready for a longer guided project, the "A Dark Beauty" full-realism tutorial walks through an entire portrait from block-in to finished detail using the same construction and layering principles covered above, applied at full depth.
These are optional structured lessons, not a replacement for the practice habits in this guide. They exist to condense hours of trial and error into a guided sequence. Browse the full collection of digital downloads to see which one matches where you are right now, or explore free tutorials and articles first if you want a preview before you commit to a purchase.
Sources
- Drawing Lab: Face Proportions
- Caran d'Ache — drawing supplies guide
- Artist demonstration: how to start a portrait — National Portrait Gallery
- How to draw a portrait in pencil — Artists & Illustrators
- Basic drawing techniques every beginner should practice — Drawinglics
FAQ
What Are Some Easy Drawing Ideas for Portrait Beginners?
Start with isolated feature studies, one eye, one nose, or one ear, drawn repeatedly from different reference photos before attempting a full head. Quick 20 minute head studies focused purely on proportion, without any shading, are another low-pressure way to build skill without the pressure of finishing a detailed piece.
What Are the Main Rules of Portrait Drawing?
The two most reliable checkpoints are that the eyes sit approximately halfway between the top of the head and the chin, and the base of the nose sits roughly halfway between the eyeline and the chin, according to face proportion research. Beyond proportion, working from large simple shapes toward small details, and building tone before adding fine detail, are the two workflow rules that matter most.
Which Method Is Best for Portrait Drawing?
For beginners, the most reliable method starts with a simple oval and centerline, blocks in tonal masses before refining individual features, and layers pencil grades from harder (HB, 2B) to softer (4B, 6B) as the drawing progresses. This step-by-step sequence, outlined in detail earlier in this guide, avoids the common trap of adding heavy detail before proportions are locked in.
Is Portrait Drawing Difficult for Beginners?
Portrait drawing is challenging at first because it demands both accurate measurement and controlled shading at the same time, but it becomes manageable when broken into the smaller steps covered in this guide. Consistent short practice sessions, focused on one skill at a time such as proportion checks or feature isolation, make the learning curve far less steep than trying to master a full portrait on your first attempt.