

Facial planes are the flat or gently curved surfaces on the head, the forehead, cheeks, jaw, nose, and chin, that catch and turn away from light in predictable ways. Learning to see them is what lets you model a face in three dimensions instead of shading a flat outline. Once you can identify the major planes, you can predict where highlights, halftones, and shadows fall before you draw a single mark. Start with a five-minute block-in using the Loomis ball-and-plane method, then check it against an Asaro head reference.
TL;DR:
- Prioritize establishing major facial planes such as the forehead, cheek, jaw, and chin before adding smaller features to avoid a stiff or overworked portrait.
- Use Loomis's construction method to build volume first, then overlay Asaro's lighting planes for accurate value placement, but only after proportion is confirmed.
- Practice drawing head block-ins rapidly from memory and overlayting reference heads to train your eye to recognize and predict plane edges and transitions.
- Focus on a single light source at a 45-degree angle during value studies, as it reveals nearly all major plane shifts and helps map highlights, halftones, and shadows effectively.
- Remember that most mistakes in facial drawing come from over-factoring planes or premature detailing; fix big shapes and proportions first before refining smaller details.
Table of Contents
- What Facial Planes Are (and Which Ones Matter Most)
- Asaro Head vs. Loomis Ball-and-Plane: Two Tools, Two Jobs
- A Practice Routine That Actually Trains You to See Planes
- Turning Plane Direction Into Tonal Decisions
- Common Plane Mistakes and How to Fix Them Fast
- Why Structured Lessons Beat Trial and Error
- The Real Gap in Most Plane Tutorials
- Ready to Practice With Guided Lessons Instead of Guesswork
- Where to Keep Studying Planes
- Sources
- FAQ
What Facial Planes Are (and Which Ones Matter Most)
A facial plane is any surface on the head that faces a slightly different direction than the surface next to it. Where two planes meet, the value changes. That edge is what your eye reads as form, and it's the entire reason facial planes exist as a concept in drawing foundations at all: they give you a system for predicting light instead of guessing at it.
Not every plane deserves equal attention early on. Prioritize the ones that carry the most visual weight before touching anything smaller.
- Major planes first: forehead, cheek and jaw mass, chin, and temple. These four define the head's basic block-in and its biggest value shifts.
- Minor planes second: nose sides, lips, eye sockets. Add these only once the major structure reads correctly in value.
- Guideline to live by: build the big shapes before you touch a single small facet. Jumping straight to minor planes is the fastest way to end up with a stiff, overworked portrait instead of a believable one.
Asaro Head vs. Loomis Ball-and-Plane: Two Tools, Two Jobs
These two models get confused constantly, but they solve different problems. Loomis builds volume. Asaro predicts light. You need both, in that order.
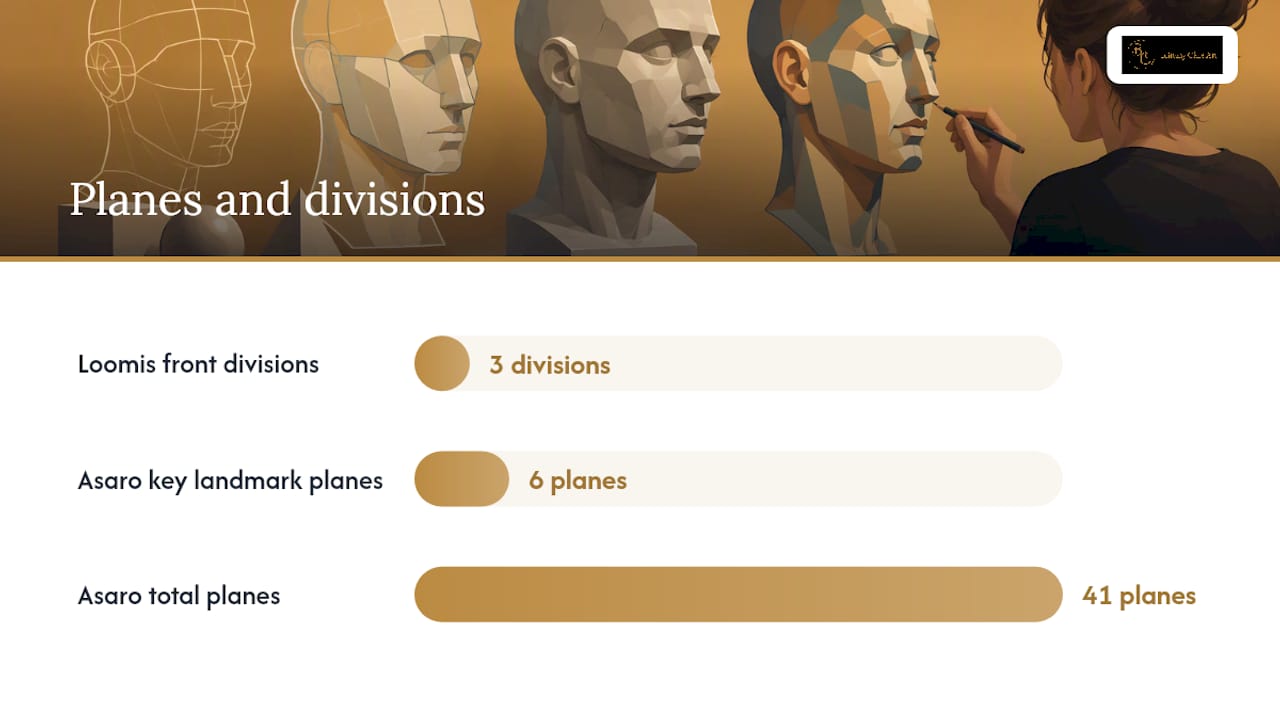
The Loomis divided ball-and-plane method uses a sphere for the cranium and a front plane block for the face. Andrew Loomis divided that front plane into thirds, hairline to brow, brow to nose base, nose base to chin, which gives you a repeatable way to place features accurately at any head angle. It's a construction tool, not a lighting tool.
The Asaro head, developed by artist John Asaro, is a 41-plane sculptural reference built specifically to map value and shadow, not anatomy. It groups those planes into four regions: cranium, forehead-and-brow band, cheek-and-jaw mass, and central feature mass. Within that set, roughly six key landmark planes carry most of the visual structure, forehead, temple, cheek, jaw, nose-side, and chin.
The reliable workflow:
- Block in volume with Loomis's ball-and-plane construction.
- Overlay Asaro's plane logic once proportions are locked.
- Run a quick value study to confirm the lighting reads correctly.
Skip the rigid overlay when your subject's individual features (a strong jaw, deep-set eyes, a rounder face shape) don't match the generalized cast. The Asaro head was never meant as a literal anatomical map. It's a lighting reference, and it works best as a starting point you adjust.
A Practice Routine That Actually Trains You to See Planes
You don't learn planes by reading about them. You learn them by drawing the same structure enough times that your hand starts predicting value before your eye finishes checking it. Here's a routine that builds that skill without burning hours you don't have.
- Warm up with 5 to 10 minute block-ins. Sketch the ball-and-plane construction from memory, several head angles in a row, no erasing. Speed matters more than polish here.
- Trace or overlay an Asaro head reference. Focus only on where plane edges sit and how they connect to landmarks like the brow ridge and jawline. This trains your eye to spot transitions on a real face later.
- Run a 45 degree single-source value study. Light your reference from one side at what portrait artists call the Rembrandt angle. This single-source setup is standard in atelier training because it reveals nearly every major plane transition at once, making it easier to map highlight, halftone, and core shadow in one pass.
- Use the 4-8-8 method to set up proportions fast. Four lines establish the frame, eight lines find the basic shapes, and a final eight lines lock in gesture and structure, all before you touch detail.
- Keep a weekly rhythm. Short daily block-ins build muscle memory; one longer value study each week builds judgment.
Pro Tip: Do your single-source value study in grayscale before you ever add color or fine detail. If the values don't read correctly in black and white, no amount of rendering will fix the form underneath.
Turning Plane Direction Into Tonal Decisions
Every plane belongs to a value family, and once you know which family it's in, shading stops being guesswork. A plane facing the light sits in your highlight or halftone family. A plane turned away from the light drops into core shadow. That's the entire logic behind value mapping.
The 45 degree Rembrandt setup is the standard training angle because that single light source exposes almost every major plane transition on the face at once, which is why ateliers default to it instead of flat, front-facing light that flattens everything.
A few checks keep you honest while you work:
- Silhouette edge: does the outer contour still read as a believable head shape, or has it gone flat?
- Reflected light: shadow planes facing another light-catching surface should lift slightly, never go pure black.
- Cast shadow anchors: shadows under the brow, nose, and lower lip should land consistently with your single light source, not drift independently.
Get those three checks right and the rest of your shading tends to fall into place on its own.
Common Plane Mistakes and How to Fix Them Fast
Most students hit the same three walls, and all three have quick fixes.
Facet-drawing is the biggest one. You chop the face into too many small, hard-edged planes, and the result looks like a low-poly video game model instead of skin. The fix: cover your drawing and squint at a reference for 15 minutes, redrawing only the major planes you can still see. Secondary planes are for refinement, not first passes.
Proportion traps show up when the thirds from your Loomis block-in drift. Recheck hairline, brow, nose base, and chin against the original division before you shade anything.
Premature detailing happens when you render pores and lashes while the underlying form is still wrong. A two-minute corrective drill fixes this: block the head back into flat major planes over your detailed drawing to confirm the volume still holds.
Pro Tip: If a portrait looks "off" but you can't say why, it's almost always a proportion or major-plane problem, never a detail problem. Fix the big shapes first.
Why Structured Lessons Beat Trial and Error
Brittanyclareart specializes in realistic portrait drawing, and the plane concepts covered here are the backbone of that whole approach. Skin texture, the part most self-taught artists struggle with longest, only reads convincingly once the underlying planes are correct, which is exactly why Brittany's 12-page skin-texture eBook builds directly on plane and value logic rather than treating texture as a separate skill.
Downloadable practice sheets and full step-by-step tutorials give you a structured path instead of scattered references, which matters most in the early months when you're still training your eye to see form correctly.
The Real Gap in Most Plane Tutorials
Most tutorials treat facial planes like a fixed template: memorize the 41 Asaro planes, apply them to every face, done. That advice sounds thorough and produces stiff drawings. The Asaro cast was built in the 1980s at Art Center College of Design as a generalized lighting reference, not a mold for every face you'll ever draw. Treating it as gospel is why so many students end up with portraits that look faceted and mechanical instead of alive.
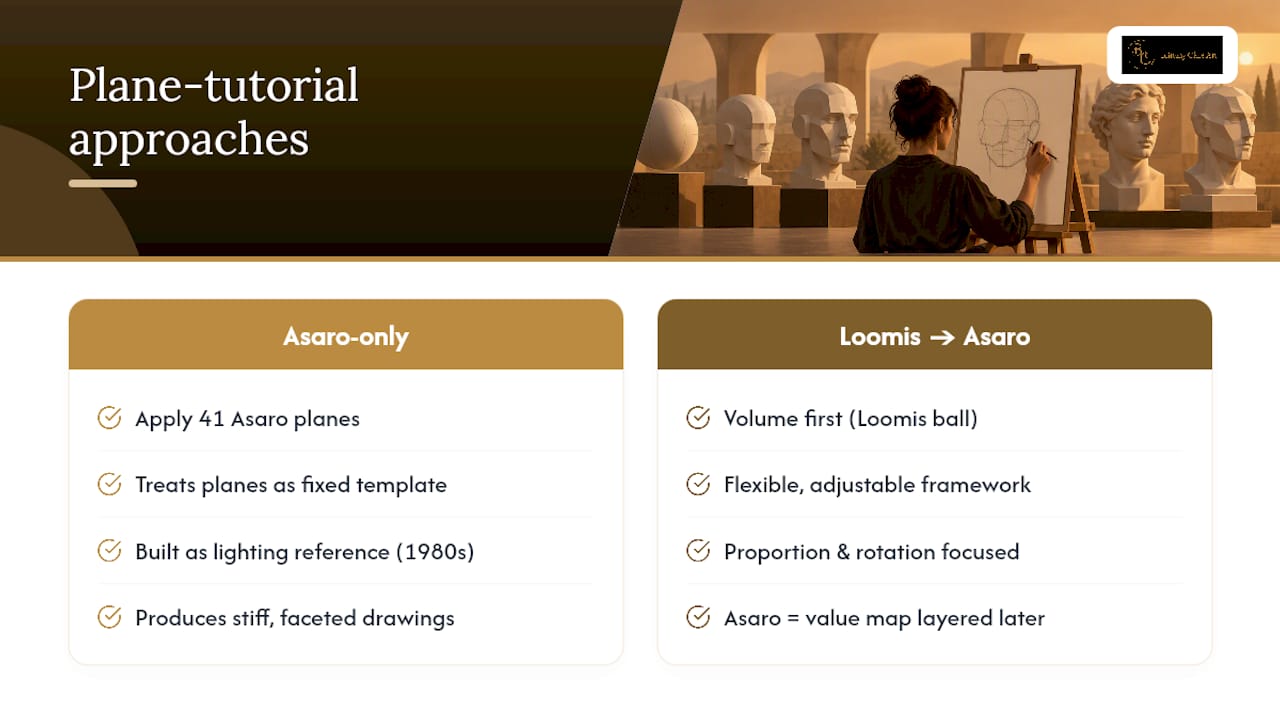
The better order of operations is volume first, light second. Loomis's ball-and-plane gives you a flexible, adjustable framework for proportion and rotation. Asaro's planes only make sense once that volumetric foundation is correct, they're a value map layered on top of good construction, not a substitute for it.
If you take one thing from this, prioritize seeing over memorizing. Six or seven major planes, drawn correctly and checked against a single light source, will outperform forty-one planes drawn from memory without understanding why they sit where they do.
— Brittany
Ready to Practice With Guided Lessons Instead of Guesswork
Piecing together plane theory from scattered articles takes months of trial and error most self-taught artists can't spare. Some art tutorial providers shorten that curve with structured, step-by-step lessons built specifically around the skin-texture and shading challenges that trip up self-taught artists most.

If skin texture and value transitions are where your portraits keep falling apart, the 12-page eBook on realistic skin patterns walks through Brittany's technique for handling those small plane shifts that make skin look convincing instead of flat. For a broader foundation that carries the plane concepts from this article into full portraits, the step-by-step drawing tutorials cover construction and shading in the same guided format. Browse the digital downloads to find the resource that matches where your practice stands right now.
Where to Keep Studying Planes
For deeper visual reference, Planes of the Head covers Asaro's original cast and its lighting logic in detail. Loomis's Drawing the Head and Hands is free on archive.org, and Jeff Searle's plane breakdowns offer practical, artist-written analysis worth revisiting.
Sources
- Drawing foundations: key terms — Facial planes | Fiveable
- Planes of the Head - Artist's Mannequin Head — Planes of the Head
- Drawing the Head and Hands — Andrew Loomis
- 7 tips for better proportions | Artists & Illustrators
- Planes of the head — Jeff Searle
FAQ
What Are the Simplified Planes of the Face?
The simplified version reduces the head to major planes only: forehead, temple, cheek and jaw mass, and chin, with minor planes like the nose, lips, and eye sockets added later. This major-plane-first approach keeps early block-ins from turning into overworked facet drawings.
What Is the Hardest Facial Feature to Draw?
Most artists find the eyes and the transition around the nose and cheek the hardest, because those areas involve several small planes meeting at once. The fix isn't more detail, it's getting the major cheek and nose-side planes correct first, then layering in the smaller shapes.
What Is the 4:8:8 Method in Art?
The 4-8-8 method is a proportion and gesture framework: four lines set the frame, eight lines establish basic shapes, and a final eight lines lock in gesture and structure before any detail work begins. It's designed to keep early proportion mistakes from compounding later.
How Do You Study the Planes of the Face?
Combine construction and lighting practice: build volume with the Loomis ball-and-plane method, then overlay Asaro plane references and run single-source value studies at a 45 degree angle. Guided routines like Brittanyclareart's step-by-step tutorials structure that practice so you're not guessing at what to study next.