
The fastest way to more accurate portrait drawing is to treat the skull as your scaffold. Learn simple construction templates like Loomis and Asaro before you touch surface detail. Sketch a skull from three angles this week, then layer muscle and skin on top of that framework. You'll place features faster, catch expressions that actually read, and stop fighting proportions on every new drawing.
TL;DR:
- Focusing on skull structure builds a reliable foundation for feature placement, expression, and proportion, reducing guesswork in portrait drawing.
- Using construction methods like Loomis or Asaro from multiple angles improves spatial understanding and simplifies complex lighting and surface rendering tasks.
- Accurately capturing facial expressions relies on understanding muscle influences; drawing wrinkles and folds correctly conveys true emotion.
- Adapting proportions to individual skull variations is crucial for likeness, rather than rigidly following average measurements.
- Breaking down portrait creation into layered steps ensures structure precedes surface detail, leading to more convincing and consistently accurate results.
Table of Contents
- Facial Anatomy for Artists Starts With the Skull
- Which Facial Muscles Matter for Drawing Expression
- How Loomis and Asaro Construction Systems Work
- How Do You Construct the Eyes, Nose, Mouth, and Ears?
- Placing Features Correctly on a Rotated Head
- Building a Weekly Practice Routine for Facial Anatomy
- Why No Two Faces Follow the Rules Exactly
- From Skull to Finished Portrait: A Step-by-Step Breakdown
- Reading Expression Through Muscle Movement
- Studying Anatomy in Live Models and Photo References
- Why Structure Comes Before Style
- Ready to Put This Into Practice?
- Sources
- FAQ
Facial Anatomy for Artists Starts With the Skull
Every convincing portrait begins with bone, not skin. The skull is essentially an egg shape for the cranium fused to a hinged jaw, and once you internalize that simple model, feature placement stops being guesswork. The mandible attaches at the temporomandibular joint, just below and in front of the ear canal, which is why the jaw swings open and closed on a fixed pivot rather than floating freely.
Instructors consistently find that students jump straight to surface detail. Skipping the skull is a mistake, since mastering bone structure first builds a scaffold that improves feature placement, expression, and foreshortening all at once.
A handful of landmarks do most of the work:
- Glabella: the flat plane between the brows, a key anchor for the bridge of the nose.
- Supraorbital ridge: the bony shelf above the eyes that catches light and casts the brow's shadow.
- Zygomatic arch: the cheekbone ridge running toward the ear, responsible for cheek width.
- Infraorbital rim: the lower eye socket edge, often visible as a subtle plane shift under the eye.
- Nasal bones: the bridge structure before cartilage takes over toward the tip.
- Mastoid process: the bump behind the ear, useful for orienting the whole side plane of the skull.
Press your own fingers along your brow and cheekbone before you draw. Feeling these landmarks on yourself trains your eye to spot them on a model or reference photo, and marking them first, before any lifework, keeps proportions honest from the start.
Which Facial Muscles Matter for Drawing Expression
Muscles in the face behave differently than muscles almost anywhere else in the body. Rather than running bone to bone, facial muscles insert directly into skin, which is exactly why a shift in muscle tension shows up instantly as a wrinkle, a fold, or a bulge on the surface. You're not drawing muscles directly. You're drawing what they do to the skin above them.
Eight muscles cover most of what you'll ever need:
- Frontalis: raises the brows, creates horizontal forehead lines.
- Orbicularis oculi: rings the eye, produces squint lines and lower lid bulge.
- Corrugator supercilii: pulls brows together, forms the vertical furrow between them.
- Zygomaticus major: lifts the mouth corners into a smile, deepens the nasolabial fold.
- Orbicularis oris: circles the mouth, controls lip shape and puckering.
- Depressor anguli oris: pulls mouth corners down in a frown.
- Masseter: bulges at the jaw corner when teeth clench.
- Nasalis: flares or narrows the nostrils.
Pro Tip: When sketching a smile, don't just curve the mouth. Draw the nasolabial fold and the slight bulge under the eye first. The mouth shape follows naturally once those two land correctly.
How Loomis and Asaro Construction Systems Work
Construction systems give you a repeatable order of operations instead of a blank page. Andrew Loomis built his method around a simple ball and plane, and that classic approach still holds up as the most practical entry point for constructing a head from any angle.
Here's the Loomis sequence in order:
- Draw a sphere for the cranium and mark a center line dividing it front to back.
- Add a horizontal line for the eye level, roughly at the sphere's midpoint.
- Slice off a flat plane at the front lower quadrant of the sphere for the face.
- Drop a vertical line down from that plane to establish jaw length and chin position.
- Divide the face plane into thirds (hairline to brow, brow to nose base, nose base to chin) to block in feature bands.
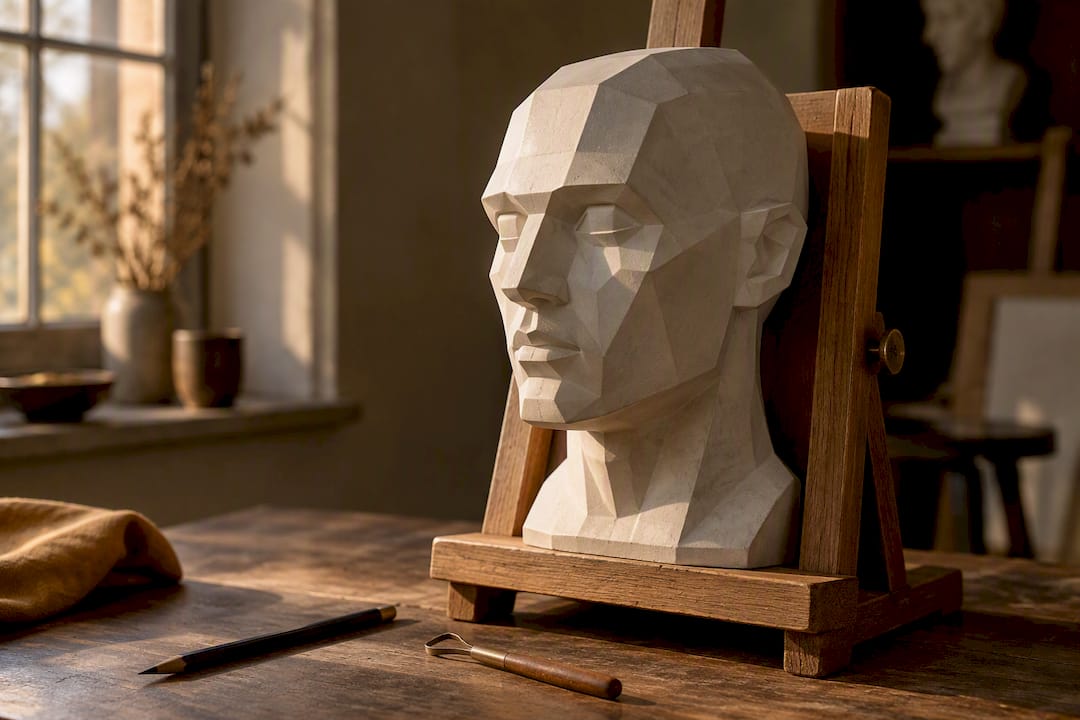
Asaro's planes take a different job: simplifying a complex, curved surface into flat, readable facets so light and shadow make sense. Using the Asaro head to teach lighting works because it strips the face down to angular chunks before you worry about soft transitions.
Standard proportion rules are useful starting points, not rules to follow blindly: the face is roughly five eye widths wide, the profile splits into thirds, and ear length typically runs from brow line to nose base. But real skulls vary. Adapting these templates to a subject's actual brow prominence, jaw width, and eye socket depth is what separates a generic head from an actual likeness.
How Do You Construct the Eyes, Nose, Mouth, and Ears?
Each feature has its own simplified geometry, and drawing that geometry before the details keeps everything sitting in the correct plane.
Eyes: Start with the eyeball as a sphere sitting inside the socket, not a flat almond shape floating on the surface. Map the upper and lower lid arcs as thin bands wrapping that sphere, then place the iris last, partially covered by the upper lid.
Nose: Block in a wedge or triangular mass extending from the glabella, wider at the base than the bridge. Refine the wings and tip afterward, and in three-quarter or foreshortened views, watch how one nostril compresses into a thin sliver while the other opens more fully.
Mouth: Begin with the center slit where the lips meet, since that line curves with the teeth underneath it. Build the upper lip as two distinct volumes and the lower lip as one rounder mass, then let shadow define the philtrum and lower lip shelf.
Ears: The outer edge follows a rough "C" shape, and the inner cartilage folds into a "U" nested inside it. Position the ear so its top aligns roughly with the brow and its bottom aligns with the base of the nose.
Placing Features Correctly on a Rotated Head
Turning the head is where most students lose accuracy fast, because the flat proportion rules that worked head on stop applying the moment the face rotates. The fix is wrapping midlines, curved guides that follow the skull's actual roundness instead of running straight across the page.
- Draw a curved vertical midline down the center of the face, bending it to match the head's rotation.
- Draw a curved horizontal line for the eye level, bending it the same direction as the vertical midline.
- Measure feature positions along those curves instead of straight across, so spacing compresses correctly on the far side of the turn.
- Recheck the ear position last, since ear placement shifts with tilt because it sits on the side of a cylinder, not a flat plane.
Try one drill: draw the same head straight on, in three-quarter view, and in profile, focusing only on whether the eye, ear, and nose stay logically connected through the turn.
Building a Weekly Practice Routine for Facial Anatomy
Short, targeted sessions beat marathon drawing sessions with no clear focus. Practice works best when each drill isolates a single variable, whether that's angle, feature, or expression, rather than trying to fix everything in one sitting.
Build your week around these:
- Skull sketches: 15 minutes, no shading, just landmarks and proportion lines.
- Three-angle feature studies: pick one feature (eyes, nose) and draw it straight on, three-quarter, and in profile.
- Expression combos: draw the same face neutral, then smiling, then frowning, tracking which muscles moved.
- Timed 20-minute head builds: full construction from sphere to finished shading, against a clock.
That time limit isn't arbitrary. Focused 20 to 30 minute drills that isolate one variable produce faster, more measurable improvement than unfocused hour-long sessions.
For reference material, live models beat photos when you can get them, but a plaster Asaro head, a 3D scan library, or museum anatomical plates all work well between sessions. Brittany Clare Art's skin pattern eBook picks up exactly where these structural drills leave off, once your bone and muscle foundation is solid enough to render convincing texture on top of it.
Why No Two Faces Follow the Rules Exactly
Proportion charts describe an average, and almost nobody's face matches the average on every measurement. One eye often sits slightly higher than the other. A jaw might be wider on one side. The nose can lean a few degrees off the facial midline without anyone noticing in person, yet it throws off a drawing if you force perfect symmetry onto it.
These variations aren't flaws to correct in your reference. They're the very details that make a portrait look like a specific person instead of a generic face. Skeletal differences drive most of this: brow ridge prominence varies enormously between individuals, jaw angles range from soft and rounded to sharp and squared, and eye socket depth changes how much shadow naturally falls across the upper lid.
Soft tissue adds another layer of variation on top of bone. Fat distribution across the cheeks, under the eyes, and along the jawline shifts with age, weight, and genetics, and two people with nearly identical skull shapes can look completely different once you account for how fat and skin sit over that structure. Asymmetry shows up most obviously around the eyes and mouth corners, since the muscles controlling those areas rarely fire with perfectly equal strength on both sides of the face.
The practical lesson: measure your specific subject rather than assuming standard proportions apply. Spotting and slightly exaggerating the single most distinctive skeletal trait, whether that's a strong zygomatic arch or a recessed glabella, does more for likeness than smoothing every feature toward the average.
From Skull to Finished Portrait: A Step-by-Step Breakdown
A finished portrait is really four layers stacked in order, and skipping the order is what produces flat, generic faces.
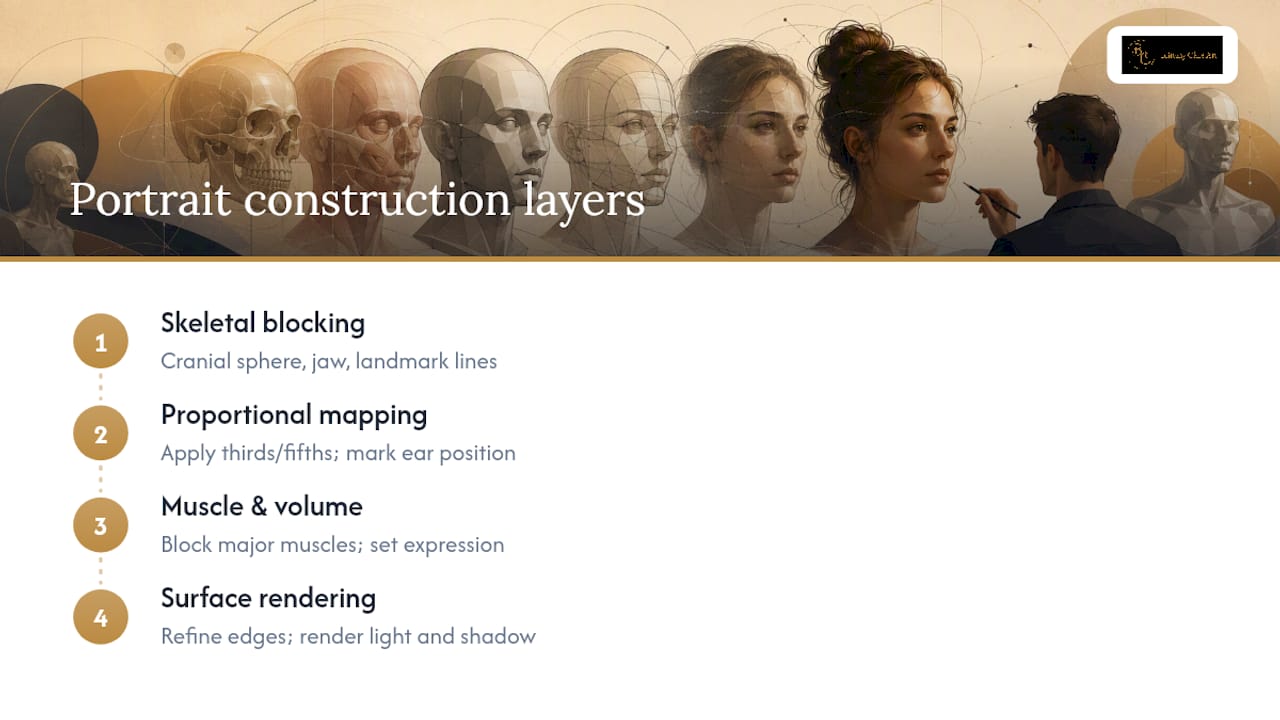
Layer one: skeletal blocking. Sketch the cranial sphere, jaw line, and major landmarks (brow ridge, cheekbone, chin) using loose construction lines. Nothing here should be tight or final.
Layer two: proportional mapping. Apply your thirds and fifths, adjusted for the specific subject's variations, to place the brow, nose base, and mouth bands. Mark ear position relative to brow and nose lines.
Layer three: muscle and volume. Block in the major muscle masses (cheek, jaw, mouth corners) as simple shapes, and note where they'll create surface folds once expression is added. This is where you decide whether the subject is neutral, smiling, or mid-expression.
Layer four: surface rendering. Only now do you refine edges, add skin texture, and render shadow and highlight. Working this layer too early, before the structure underneath is locked, is why so many portraits look accurate up close and wrong from across the room.
Each layer should take less time than the one before it if the earlier layers were done correctly. If you're spending most of your session erasing and repositioning features during the rendering stage, the problem almost always traces back to a skipped or rushed layer one or two.
Reading Expression Through Muscle Movement
Expression is muscle movement made visible, and once you can read which muscles are firing in a photo or a live model, drawing that expression becomes a lot less like guesswork.
A genuine smile tells a clear anatomical story. The zygomaticus major pulls the mouth corners up and back, which deepens the nasolabial fold running from nose to mouth, and it simultaneously pushes up the cheek mass enough to narrow the eyes slightly, even without any conscious squinting. A polite or forced smile often skips that eye narrowing entirely, since the orbicularis oculi around the eye isn't engaging the way it does in a spontaneous smile.
A frown works through the opposite chain: the depressor anguli oris pulls mouth corners down while the corrugator supercilii draws the brows together, carving that vertical furrow between them. Surprise stretches the frontalis upward, smoothing the forehead into raised horizontal lines while the eyes widen as the upper lid retracts.
The practical skill here is drawing the muscle's effect, not the muscle itself. You never render a visible frontalis muscle. You render the horizontal forehead lines it produces and the lifted brow position that comes with it. Study a single expression in a mirror or photo, name which muscles are likely engaged, then sketch only the surface consequences: the folds, the volume shifts, the compressed or stretched skin. That habit turns expression from something you copy into something you understand.
Studying Anatomy in Live Models and Photo References
Live models give you information photos simply can't capture: how skin shifts as a person breathes, blinks, or turns their head slightly between poses. Watch for small movements during a sitting rather than treating the pose as frozen. A model's face rarely stays perfectly still, and those micro-shifts reveal which muscles are actually load-bearing versus relaxed at any given moment.
Photos flatten depth and can distort proportions depending on lens length and distance, so cross-check any photo reference against what you know about skull structure rather than trusting it blindly. A wide-angle shot taken too close will exaggerate the nose and compress the ears, and if you don't recognize that distortion, you'll copy it straight into your drawing.
When working from either source, scan in a consistent order: landmarks first (brow ridge, cheekbone, jaw angle), then major muscle masses, then fine surface detail last. Ask yourself where the light catches a bony plane versus a soft tissue curve. Bone tends to produce sharper, more defined shadow edges, while fat and muscle create softer, more gradual transitions.
Cross-reference unusual features against the anatomy you've already learned instead of assuming your reference is wrong. If a jaw looks unusually wide in a photo, check whether that's the masseter muscle flexed from clenching, added fat volume, or simply the actual bone structure of that individual. Training yourself to ask that question turns every reference session into an anatomy lesson, not just a copying exercise.
Why Structure Comes Before Style
Students almost always want to jump to rendering skin, and it's an understandable urge since that's the part that looks impressive. But the drawings that hold up under real scrutiny are the ones built on solid bone and muscle placement first. When a portrait feels "off" but a student can't say why, the problem is almost never the shading. It's a feature sitting a few degrees away from where the skull actually put it.
What surprises most students once they commit to skull-first construction is how much faster their blocking gets. Likeness stops being a matter of luck and starts being a matter of measurement. Once that foundation is solid, rendering skin texture becomes the fun part rather than the part covering up structural mistakes underneath.
— Brittany
Ready to Put This Into Practice?
Anatomy knowledge only pays off once it's applied to an actual drawing, start to finish. Brittany Clare Art's step-by-step tutorials turn the construction and muscle work covered here into a guided workflow, so you're not left guessing how skull-first drawing translates into a finished piece.

If skin texture is where your drawings tend to fall apart after solid structural work, the skin pattern eBook picks up exactly at that handoff point, teaching Brittany's repeatable technique for rendering realistic surface detail once your bone and muscle foundation is in place. For a full project that applies everything from blocking to final rendering, A Dark Beauty walks through an entire realistic portrait from start to finish. Browse the Digital Downloads shop to find the tutorial that matches where you are in your practice right now, and start your next drawing with the structure already worked out.
Sources
- Artistic Anatomy Lecture: The Face — ArtProf
- Anatomy of the Head for Artists — Portrait Society of America
- Drawing the Head and Hands — Andrew Loomis (archive)
FAQ
How Do You Learn Facial Anatomy for Art?
Start with the skull rather than skin, since bone structure controls where every feature sits and moves less between individuals than soft tissue. Work through a construction system like Loomis to practice placing features from different angles, then layer in the eight or so major expression muscles once feature placement feels reliable.
Is There a Free 3D Anatomy Model for Artists?
Several anatomy-for-art platforms offer sample or preview models, including Anatomy for Sculptors, which uses 3D scans and plaster head references to teach layered facial structure. Museum sites like the Met also offer free historical anatomical references worth studying alongside a 3D model.
What Is the Hardest Facial Feature to Draw?
Most artists struggle most with eyes and ears, since both involve subtle curved geometry that shifts significantly with head rotation. Ears are especially tricky because their apparent position on the page changes with tilt, since the ear sits on the side of the cranial cylinder rather than on a flat plane.
Is Morpho Anatomy Good for Artists?
Morpho-style anatomy references can be a useful supplement for studying muscle groups and simplified forms, though they work best alongside a construction system rather than as a replacement for one. Pairing any anatomy reference with practical templates like Loomis or Asaro, plus regular timed drills, tends to produce faster improvement than reference study alone.
What Should I Draw First When Practicing Facial Anatomy?
Begin with loose skull sketches focused on major landmarks: the brow ridge, cheekbones, and jawline, before adding any muscle or skin detail. Once landmark placement feels consistent across different angles, move on to feature construction and then muscle studies tied to specific expressions.